
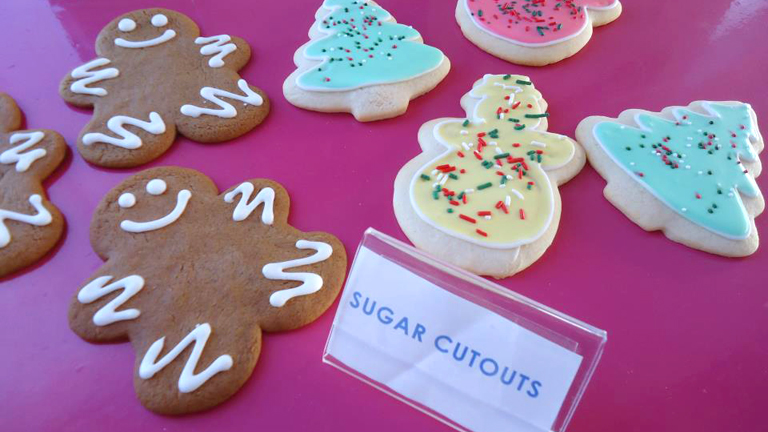
How to Decorate Sugar Cookies Like a Pro (Even if You’re a Beginner)
Decorating sugar cookies is more than just frosting a treat—it’s a creative, rewarding craft that turns a simple cookie into a custom work of edible art. Whether you’re prepping for holidays, birthdays, weddings, or just want to impress friends and family, learning how to decorate sugar cookies opens up a whole new world of baking fun.
This guide will walk you through the entire process, from baking sturdy cookies to adding that final decorative detail.
🧈 First Things First: Start with the Right Sugar Cookie
A well-decorated cookie begins with a cookie that:
- Holds its shape during baking
- Tastes great on its own
- Has a flat, even surface for decorating
🎯 Pro Sugar Cookie Recipe Tips:
- Use unsalted butter and granulated sugar.
- Don’t use baking powder—it causes spreading.
- Chill the dough before rolling.
- Roll evenly to about ¼-inch thickness.
- Bake until just set—don’t overbake!
Want my optimized sugar cookie base recipe? Just ask!
🧁 Types of Icing for Sugar Cookies
🎨 1. Royal Icing
- Dries hard with a shiny finish.
- Great for piping, flooding, and layered detail work.
- Made from powdered sugar, meringue powder (or egg whites), and water.
- Long shelf life.
Perfect for: Intricate designs, layering, and stackable cookies.
🍥 2. Buttercream Icing
- Soft, creamy, flavorful.
- Doesn’t dry hard, but develops a crust.
- Great for swirls, stars, and thick shapes.
Perfect for: Flavor-forward cookies, younger decorators, or casual parties.
🍯 3. Glaze Icing
- Made from powdered sugar, milk, and corn syrup.
- Smooth and shiny; dries firm but not hard.
- Less control than royal icing.
Perfect for: Simple flooding, drizzle designs, or low-effort decorating.
🧑🍳 Royal Icing 101 (The Most Popular Option)
Here’s a basic royal icing recipe and how to work with it.
⭐ Ingredients:
- 4 cups powdered sugar
- 3 tablespoons meringue powder
- 6–8 tablespoons warm water
- 1 teaspoon vanilla or almond extract (optional)
👨🍳 How to Make:
- Beat meringue powder and powdered sugar.
- Slowly add water until stiff peaks form (~7-10 minutes).
- Add flavoring, if using.
🎯 Three Royal Icing Consistencies:
| Consistency | Use | Check |
|---|---|---|
| Stiff | Flowers, borders | Holds stiff peaks |
| Medium | Outlines | Slightly softer, soft peaks |
| Flood | Filling large areas | Settles in 10–15 seconds |
💡 Flood test tip: Drag a knife through icing. If it smooths out in 10 seconds, it’s perfect flood consistency.
🛠️ Essential Tools for Cookie Decorating
| Tool | Purpose |
|---|---|
| Piping bags (disposable or reusable) | Hold and dispense icing |
| Piping tips (Wilton #1–#3, star tips) | Create outlines and details |
| Scribe tool / toothpick | Spread icing and pop bubbles |
| Couplers | Switch piping tips without changing bags |
| Food coloring (gel-based) | Add vibrant color without watering down |
| Turntable or lazy Susan | Smooth, steady decorating |
| Edible markers | Draw guides or facial features |
| Tweezers | Place sprinkles or decorations accurately |
| Paint brushes | Add shimmer or fine lines with edible dust |
🖌️ Step-by-Step Sugar Cookie Decorating Tutorial
Step 1: Prep Your Cookies
- Bake and cool completely—preferably overnight to prevent sweating.
- Make sure surfaces are flat and free of crumbs.
Step 2: Mix & Color Your Icing
- Make a batch of royal icing.
- Divide and tint using gel food coloring (AmeriColor, Chefmaster, etc.).
- Store covered with plastic wrap touching the surface to prevent crusting.
Step 3: Prep Piping Bags
- Use couplers for easy tip changes.
- Fill with icing and twist tops to secure.
- For flooding, snip off the tip of the piping bag if you’re not using a metal tip.
Step 4: Outline the Cookie
- Use a medium consistency icing.
- Hold the bag at a 45° angle and pipe a clean outline along the cookie’s edge.
- Let it set 5–10 minutes before flooding.
Step 5: Flood the Cookie
- Use flood consistency icing.
- Fill inside the outline, gently guiding icing with a scribe or toothpick.
- Pop any air bubbles immediately.
Step 6: Let Dry
- Allow flooded cookies to dry for at least 8–12 hours uncovered.
- Use a fan or dehydrator to speed up drying without color bleeding.
Step 7: Add Detail Work
- Use stiff or medium icing for:
- Letters
- Borders
- Eyes/faces
- Scrollwork or florals
- Dry 1–2 hours between layers to prevent bleeding.
Step 8: Add Finishing Touches

- Sprinkles
- Edible glitter or gold dust
- Icing transfers (made in advance and added later)
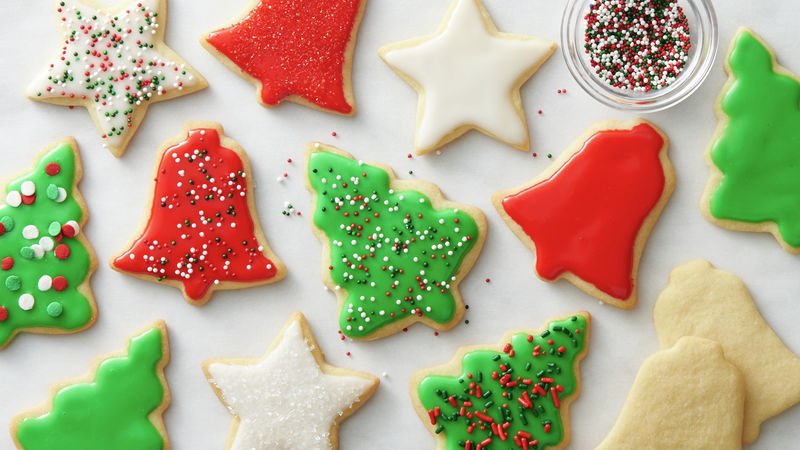
🌈 Fun Decorating Ideas by Theme
| Theme | Techniques |
|---|---|
| Christmas | Snowflakes, trees, ornaments, gingerbread men |
| Halloween | Pumpkins, mummies, ghosts, candy corn |
| Valentine’s Day | Hearts, roses, “love” lettering, ombre flooding |
| Spring/Easter | Pastels, bunnies, flowers, eggs |
| Birthdays | Balloons, names, numbers, rainbow swirls |
🧊 Storage and Shipping Tips
| Situation | Solution |
|---|---|
| Short-Term Storage | Store in an airtight container for 1 week at room temperature |
| Freezing Decorated Cookies | Freeze in a single layer with parchment, thaw in container to prevent condensation |
| Shipping | Wrap cookies in bubble wrap, then box snugly with padding. Use heat-sealed bags for freshness |
🛠️ Troubleshooting: Common Issues & Fixes
| Problem | Cause | Solution |
|---|---|---|
| Icing won’t set | Too humid or thin icing | Use a fan or move to drier area |
| Air bubbles in icing | Overmixed or not popped | Tap cookie and use scribe to pop |
| Icing bleeding | Colors too wet or humid conditions | Dry longer between layers; use gel coloring |
| Cookies spreading | Dough too warm or with baking powder | Chill dough and omit leavening |
| Crusty icing bags | Icing exposed to air | Cover tips with damp paper towel or use tip caps |
🎁 Gifting & Displaying Decorated Cookies

🎀 Presentation Ideas:
- Cellophane bags with ribbon
- Cookie boxes with shredded paper
- Cookie bouquets (on sticks)
- Holiday tins or custom jars
- Favor bags with name tags
🧊 Tip for Gifting:
- Let cookies fully dry before stacking or packaging (8–24 hours).
- Add bubble wrap or tissue between layers to avoid breakage.
Table of Contents
📋 Frequently Asked Questions
1. How long do decorated sugar cookies last?
Up to 1 week at room temperature or 3 months frozen. Always store in an airtight container.
2. Can I decorate warm cookies?
No! Warm cookies will melt the icing and ruin the structure. Cool completely before decorating.
3. What’s the best food coloring for icing?
Gel food coloring (like AmeriColor or Chefmaster). It’s vibrant and won’t affect consistency.
4. Why is my royal icing separating?
It’s overmixed or sitting too long. Stir gently before use. Store in airtight containers.
5. Can I make royal icing without meringue powder?
Yes, substitute with pasteurized egg whites (about 3 tablespoons) but be mindful of shelf life.
6. How do I make my cookies taste as good as they look?
Use a flavorful sugar cookie base with vanilla, almond, or citrus zest. Avoid dry, bland doughs.
7. How do I fix runny icing?
Add a little more powdered sugar. If too thick, add water ¼ teaspoon at a time.
8. Do I need to refrigerate royal icing?
No, royal icing can be kept at room temp in an airtight container for a week. Stir before reuse.
9. How do I dry decorated cookies faster?
Use a cooling fan or dehydrator on the lowest setting for even airflow and quicker crusting.
🥇 Final Thoughts: Practice, Patience, and Play
Decorating sugar cookies can feel intimidating at first—but with the right tools, a bit of patience, and some practice, you’ll be creating stunning, bakery-style cookies in no time. Each cookie is a blank canvas to explore your creativity, and every mistake is a step toward improvement.
Whether you’re going for seasonal cookies, special occasions, or just some fun in the kitchen, sugar cookie decorating is both an art and a joy.
So grab your piping bags, cue up your favorite music, and dive into the colorful world of cookie decorating!