
You only need 7 simple ingredients to whip up these dinner rolls. Flaky, soft, and loaded with buttery goodness, these fresh rolls steal the spotlight from any main dish. If you’re new to baking bread, check out this blog post to learn all about the yeast rolls recipe, including how to prep them ahead of time. You can also peek at my Baking with Yeast Guide for answers to common yeast questions.
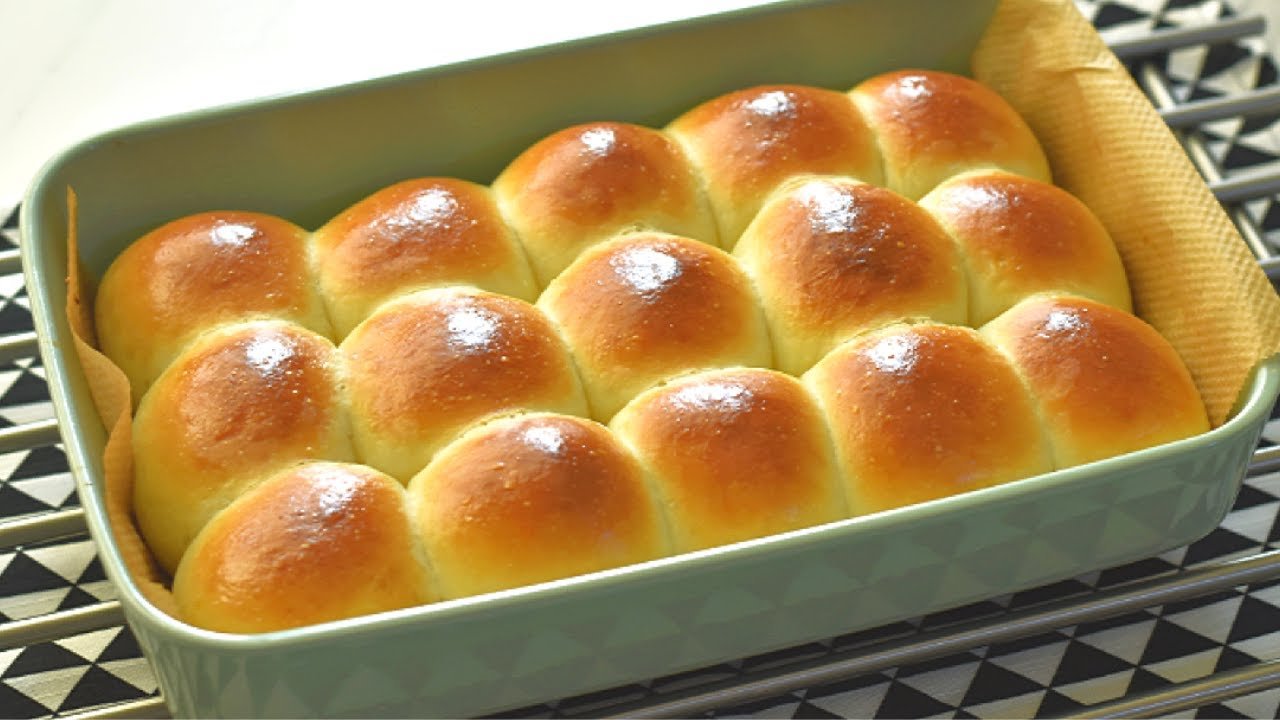
Dinner rolls in glass baking pan
This post may contain affiliate links. Read our disclosure policy.
Ever crave homemade bread but feel too nervous to try?
Does yeast dough make you want to bolt?
Do bread recipes seem way too complex?
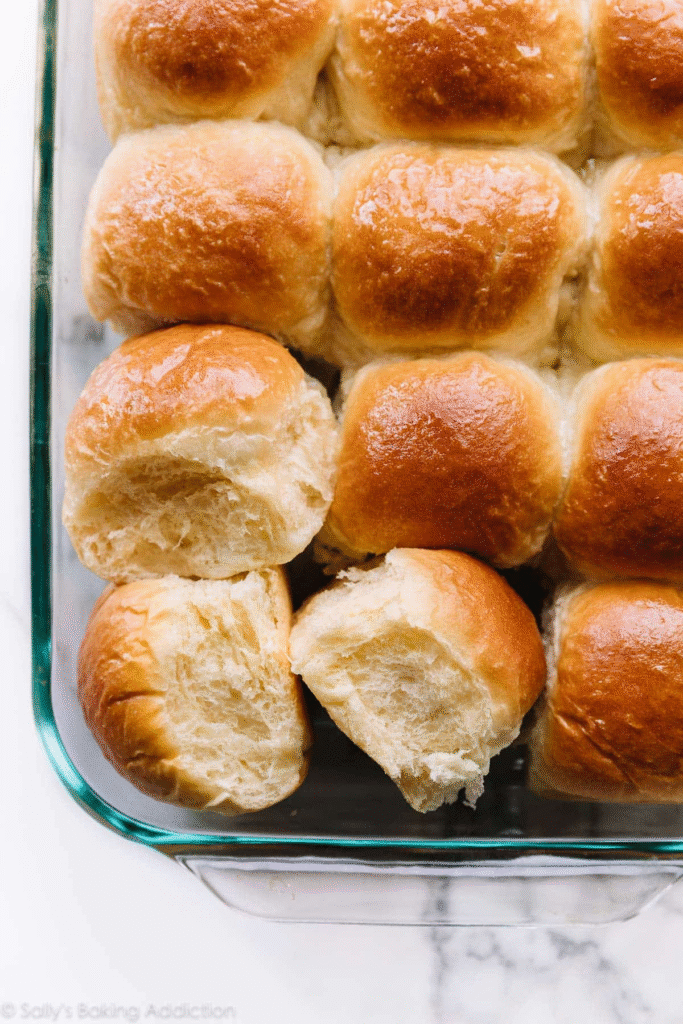
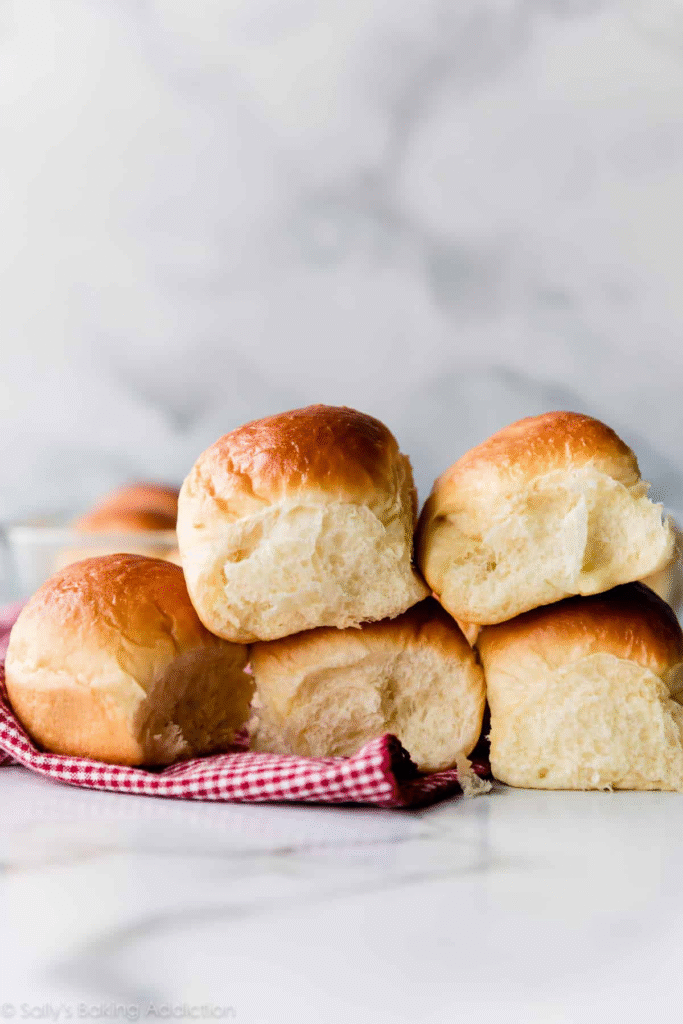
I’m here to teach you how to make homemade dinner rolls—the best I’ve ever had, all starting with a simple 7-ingredient dough. I bake these rolls whenever I can, even bringing a pan to friends who just had a baby. They’re pillow-soft, with the most delicious flaky, buttery texture. Once you make them, everyone will beg you to bake them again and again.
And with this recipe, I promise you’ll finally feel confident baking bread.
Overview: How to Make Homemade Dinner Rolls
- Make the dough. (More details on that below!)
- Knead the dough. Need help? Watch my How to Knead Dough video tutorial.
- Let the dough rise. In a warm spot, it takes about 1-2 hours.
- Punch down the dough to release air, then shape into rolls.
- Let the rolls rise for another hour.
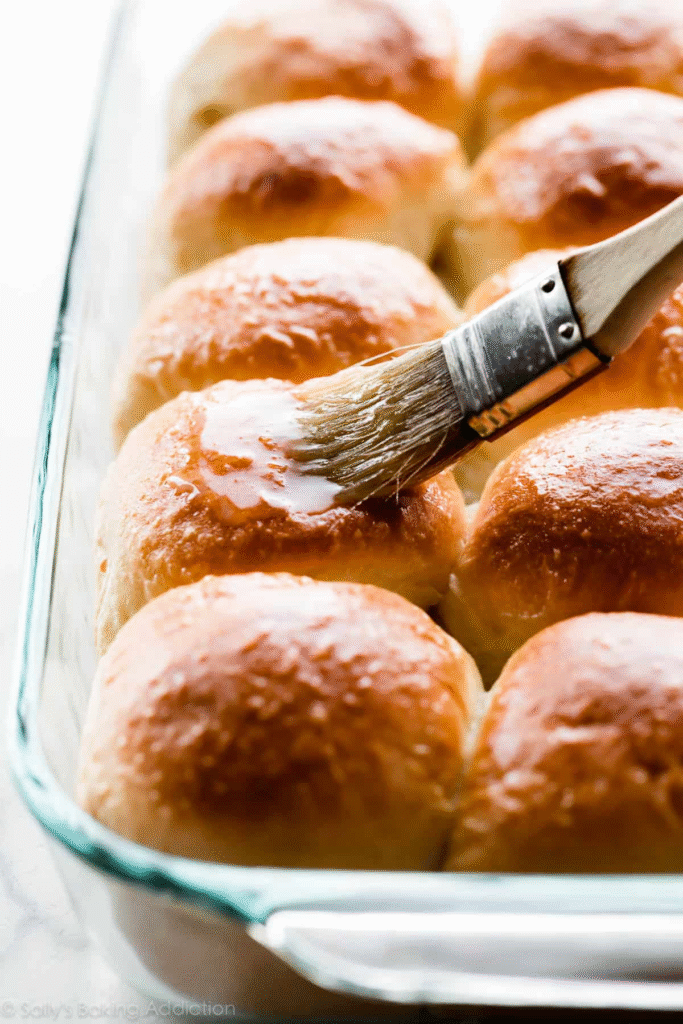
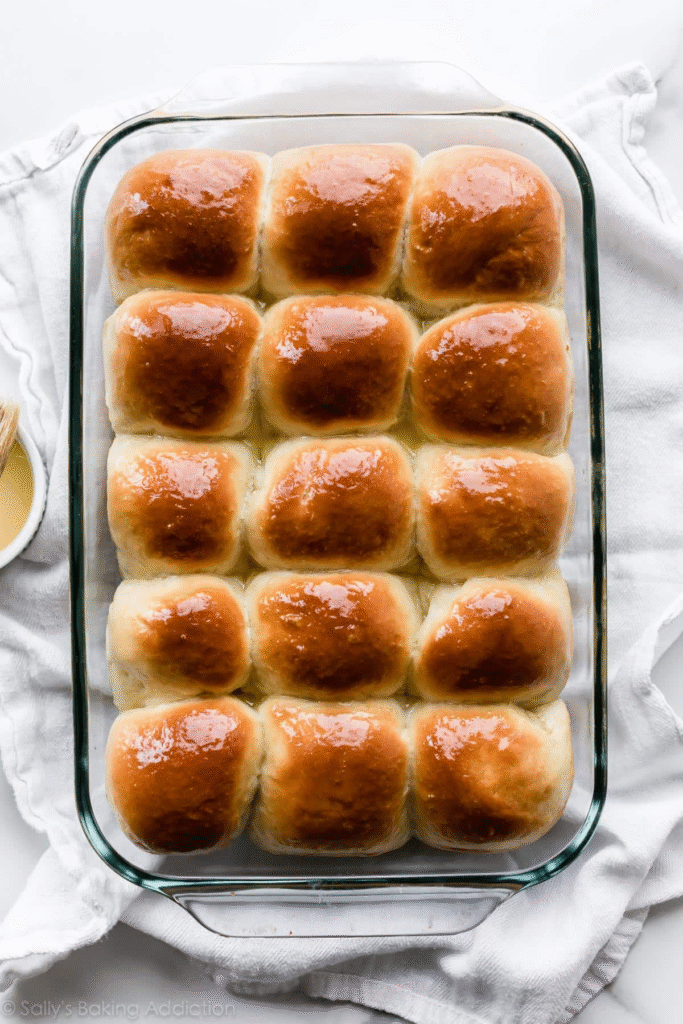
- Bake for 20-25 minutes until golden. For extra flavor, brush warm rolls with honey and melted butter.
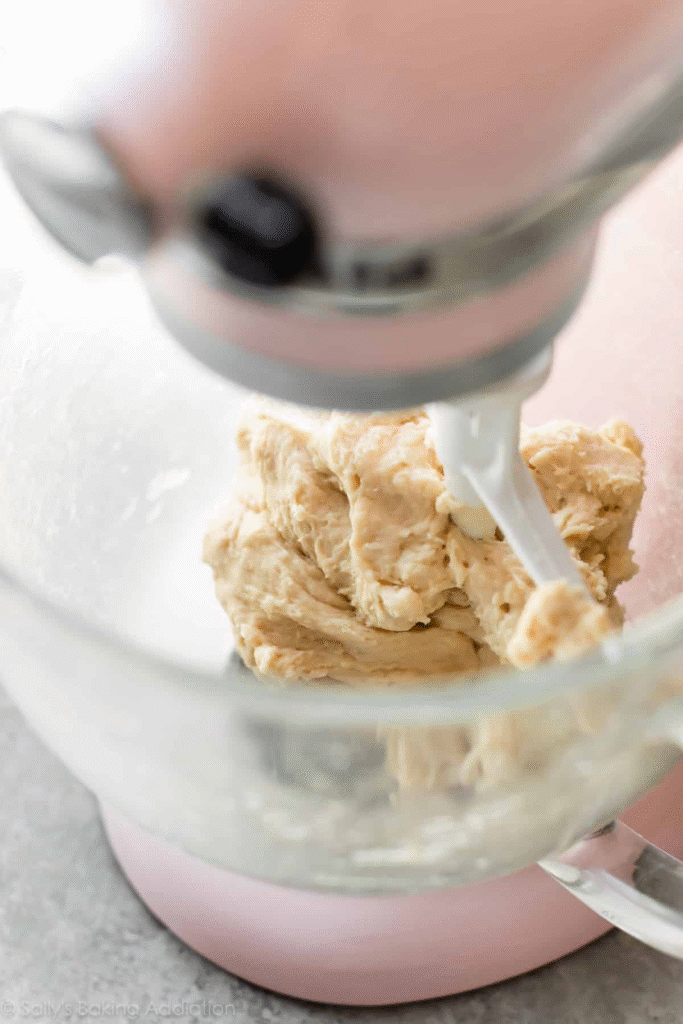
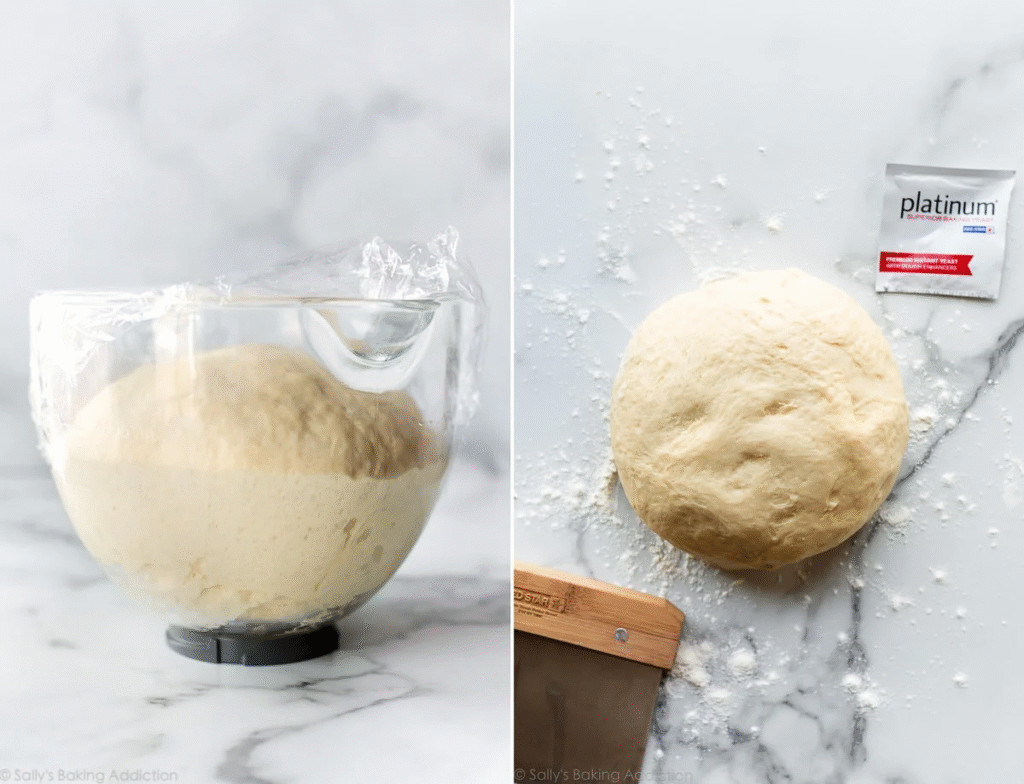
The dough comes together in a mixer—either with a paddle attachment or dough hook. You can make it by hand, but it’ll give your arms a workout. After mixing, you can keep kneading with the mixer or do it by hand
Soft Dinner Rolls Need a Rich Dough
Crusty, chewy bread? That’s a lean dough (less fat). Soft, rich bread? That’s a rich dough (more fat). Unlike bagels, focaccia, or artisan bread, these rolls need a rich dough—meaning plenty of fat (milk, butter, egg).
You’ll use the same 7 ingredients as my easy cinnamon rolls (just less sugar since these aren’t sweet).
- Milk: Activates the yeast. Whole milk = best flavor & texture (but nondairy/low-fat works too).
- Yeast: Active dry or instant (I love Red Star’s Platinum Yeast—instant yeast with dough improvers).
- Sugar: Feeds the yeast and tenderizes the dough.
- Egg: Adds structure and flavor.
- Butter: Makes rolls soft and tasty (must be room temp!).
- Salt: Essential for flavor.
- Flour: All-purpose or bread flour (bread flour = chewier rolls).
After making the dough, let it rise:
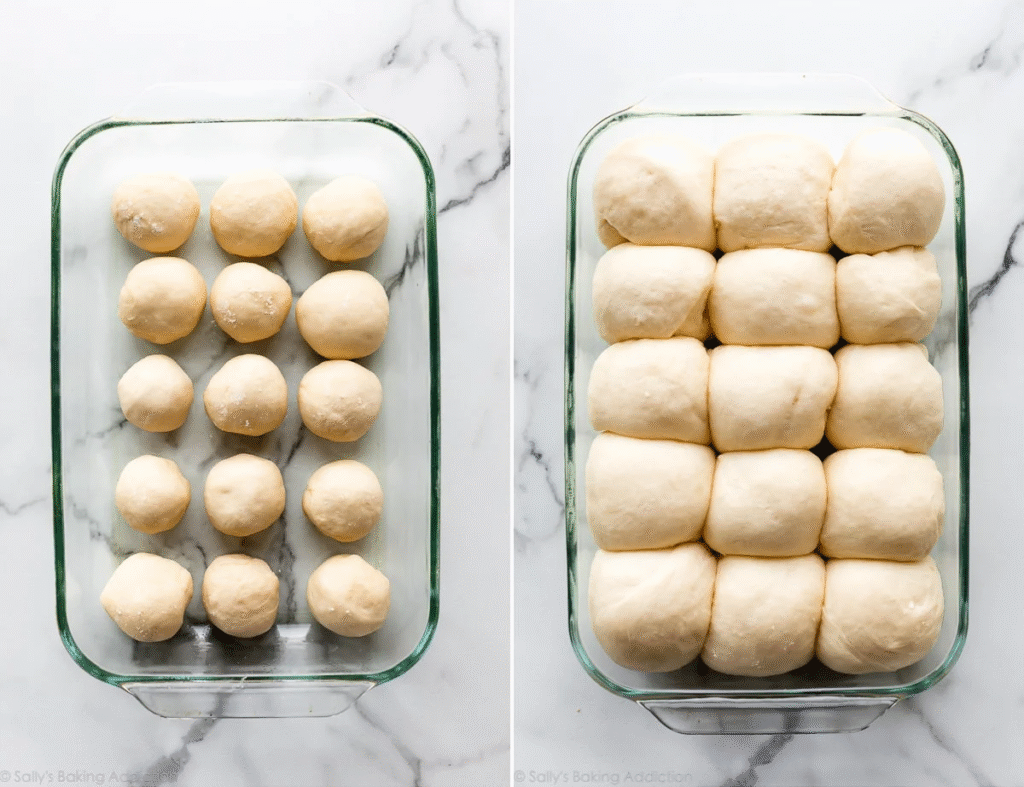
Then, punch it down, shape into balls, and arrange in a pan. Don’t stress if they’re not perfectly even!
Let them rise again—look how puffy they get after an hour:
How to Shape Dinner Rolls
You can twist, knot, or even make cloverleaf rolls, but let’s keep it simple:
- Divide dough into 14-16 pieces.
- Stretch the top of each piece while pinching/sealing the bottom (like shaping hot cross buns).
Make-Ahead Yeast Rolls
No time for 3 hours of rising? No problem!
- Refrigerate: After shaping, cover rolls and chill for up to 16 hours. The next day, let them rise for 1-2 hours before baking.
- Freeze: Freeze shaped rolls in a pan, then transfer to a bag once frozen. Thaw/rise for 4-5 hours, then bake.
- Freeze baked rolls: Bake the whole batch, then freeze extras to reheat later.
Perfect for Easter, Thanksgiving, or Christmas!
Dinner Roll Flavor Ideas
Mix these in with the flour:
- Rosemary: 2 Tbsp fresh/dried chopped rosemary.
- Cheddar: 1 cup shredded cheddar (avoid soft cheeses).
- Garlic & Herb: 2 tsp each dried rosemary, basil, parsley + 1 tsp garlic powder.
- Whole wheat, brown butter sage, honey butter, sweet potato, multigrain—or swipe with honey butter or cinnamon butter!
Note: This dough isn’t ideal for a loaf—try my sandwich bread or whole wheat bread instead. For egg-free dough, go for breadsticks. Love pizza? Try pizza pull-apart rolls!
3 Success Tips
- Check my Baking with Yeast Guide for FAQs.
- Yeast must be fresh (check the expiration date!).
- Measure flour right: Spoon & level—don’t scoop (or you’ll get dense rolls).
Last tip? Don’t save these just for dinner! Use them for sliders, breakfast sandwiches, dipping in soup, or alongside salad. And remember—you can become a bread-baking pro.